
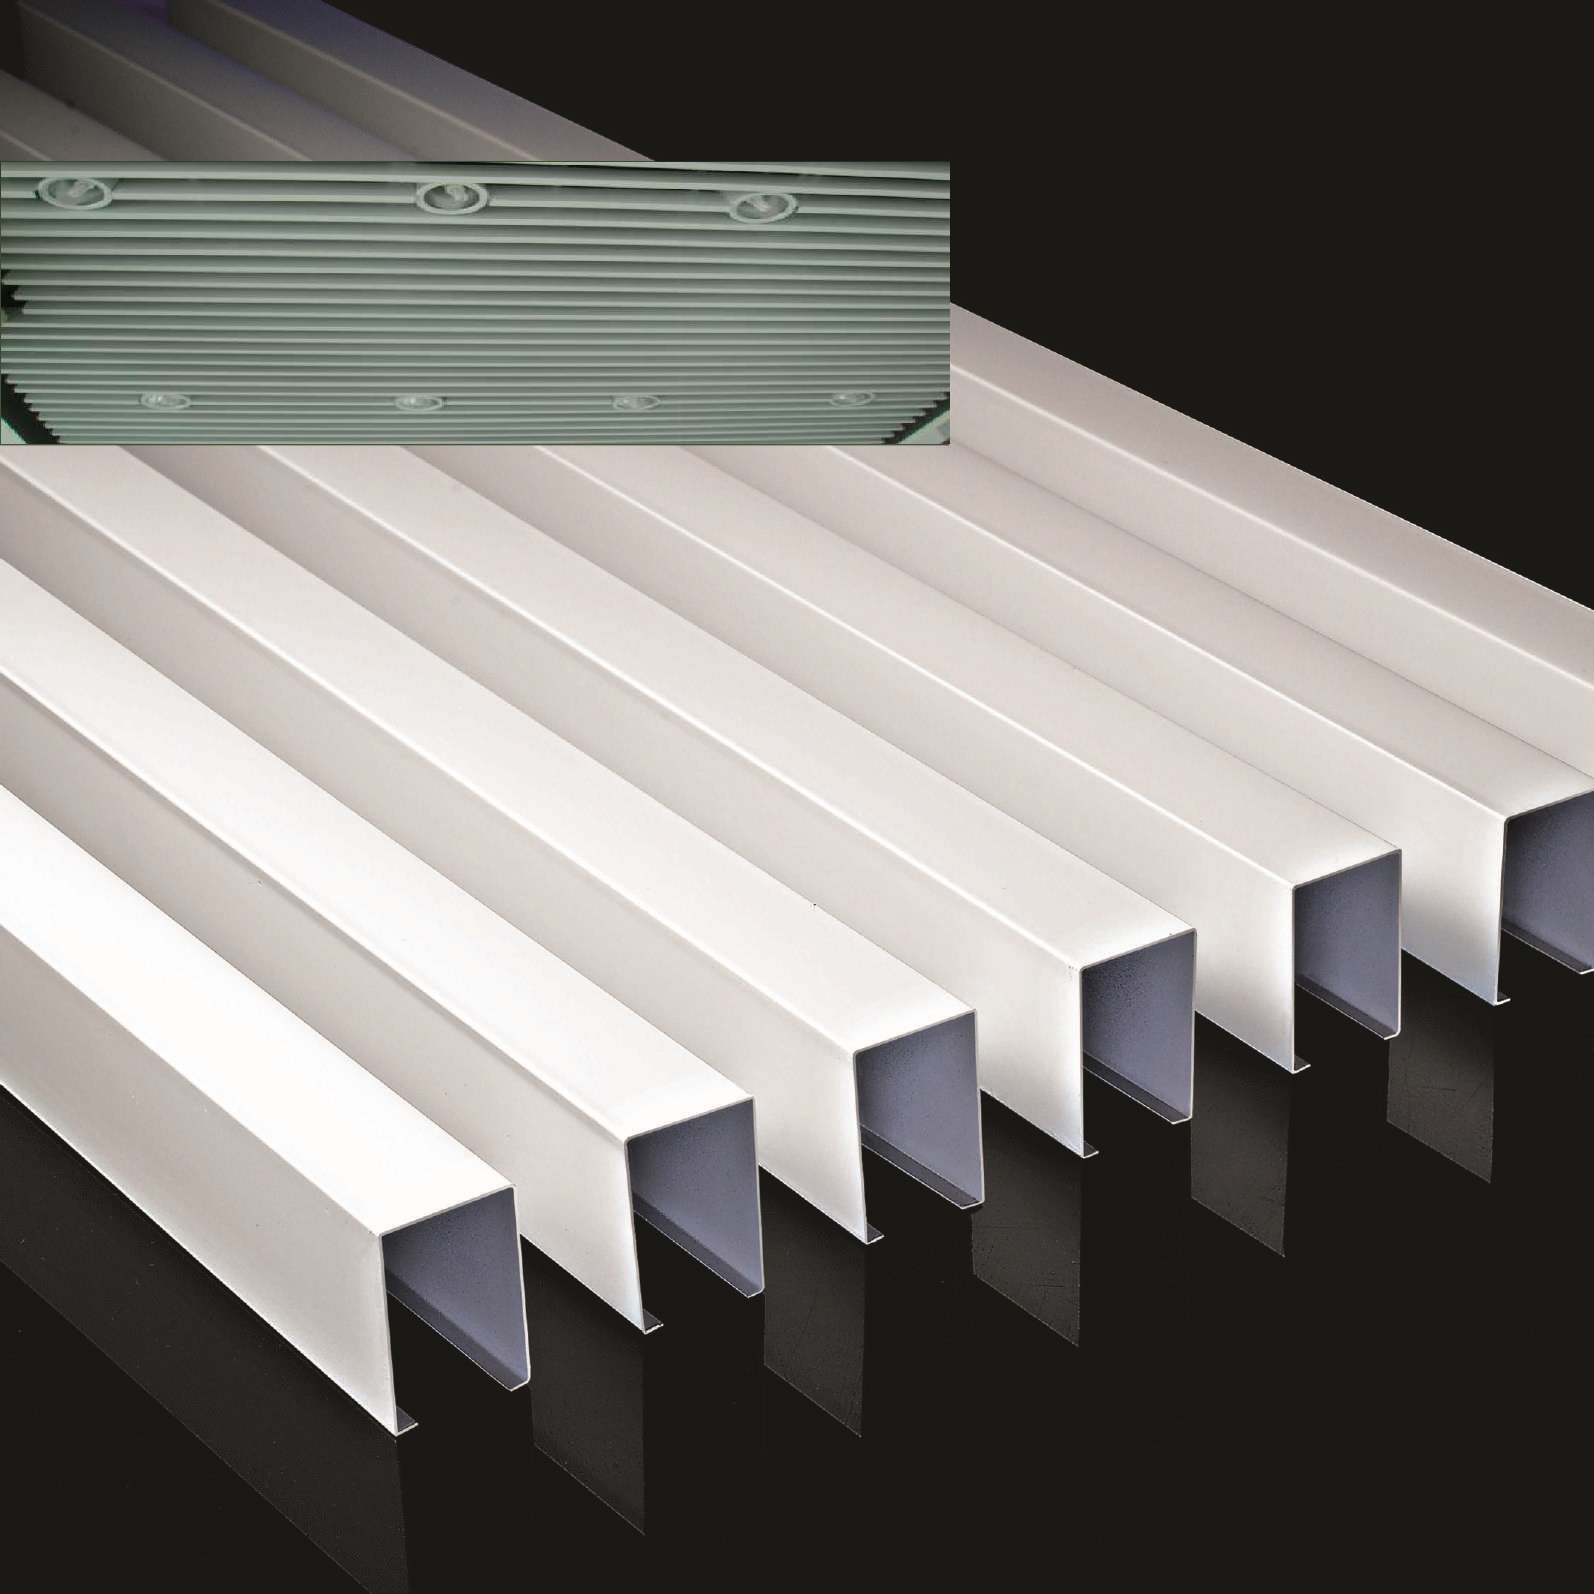
What is a Baffle U strip Ceiling?
The Baffle U-strip ceiling is a sort of liner ceiling in which we employed a U-strip panel on the alternate space and hung those in the ceiling with the aid of a U-strip carrier.
Baffle U strip ceiling concept:
Sometimes the only extravagant, lovely appearance and a few acoustic qualities are project requirements. The importance of those locations' ceiling presentations as regal, exclusive, and magnificent increases. Therefore, the term "Baffle U strip ceiling" refers to a new style of ceiling that was built with these specifications in mind.
Advantages:
1. Simple to install
2. Minimal weight
3. Gorgeous Appearance
4. Numerous options for adding more design.
5. Excellent acoustic qualities.
6. Simple to uninstall and reinstall in case of plenum repairs.
Sound Absorption:
An adequate acoustic environment is created from the ceiling side of the baffled ceiling by panels fitted in a different area in a perpendicular direction.
Perforated panels are an option if you need extra acoustic qualities. Use perforation—punching the panels—which is essentially what is needed for acoustic qualities. Punching holes are typically 1.8mm and 2.5mm in diameter. In those days, there were numerous punching styles, including square and rectangular ones, and people used punching to create various designs on panels as well. Attach non-woven acoustic fleece within the panels after perforating them to increase their acoustic properties. In addition to absorbing sound waves, these perforated panels also provide acoustic environments.
Insulation characteristic
The baffle false ceiling does not provide insulation from the ceiling side since there is no plenum between the main and false ceiling. You can put glass wool or rock wool inside panels if you require insulation, but it will be expensive.
Design:
There are several ways to use the baffle ceiling to create something novel:
The baffle ceiling can be used in a variety of inventive ways:
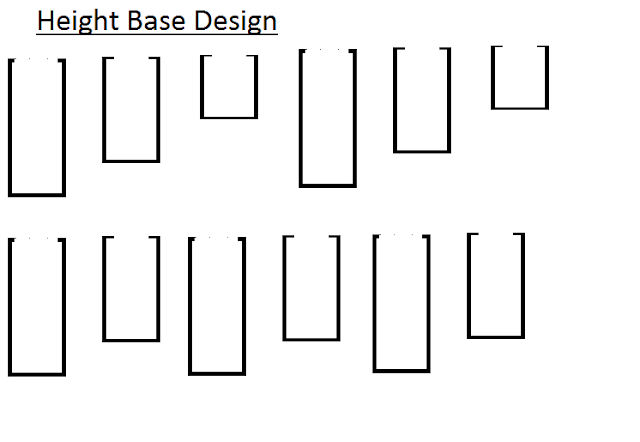
- Panel Height: To build the design, we can use varied height panels in one location, for example. We choose a panel's width of 50 millimeters and a center-to-center spacing of 150 millimeters for a space of one square. Then, we can select a panel that is 200mm, 175mm, 150mm, 125mm, 100mm, 75mm, or 50mm thick. We can install those in a conventional or unconventional pattern.
- Patterns made with various color combinations are possible on the basses.
- Create Figure: By using baffle panels, you may make a variety of shapes, including triangles, squares, and ovals.
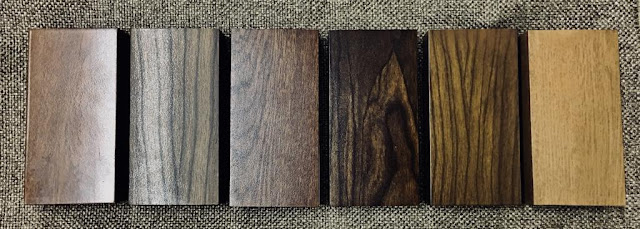
- Finishing for wood
Where to Install Best:
Baffle Ceiling Ideal for showrooms, department stores, retail establishments, restaurants, cafeterias, offices, conference rooms, and other locations with heavy business traffic.
How do I choose the distance between two baffle panels?
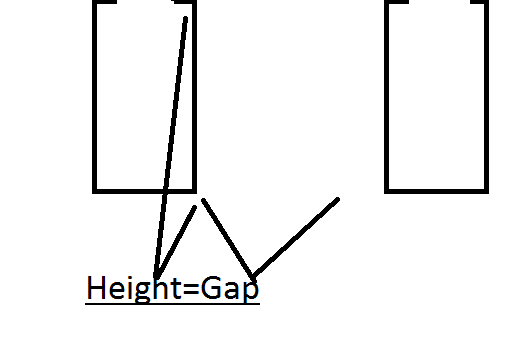
Because a person enters a room and only sees the ceiling side, his eyes naturally glance at a 45-degree angle, the typical rule for choosing the spacing between two baffles is to simply keep the space equal to the height of the baffle. If the baffle height and the gap are equal from this angle, the main ceiling visibility is only partially obscured for him. However, other individuals advise obtaining the same baffle exposed width. Simply following the first rule is what we advise.
Sizes:
The standard size of baffle height 100mm, width 50mm and center to center gap is 150mm. but we may go with other specification also according project requirement. The length of baffle you can have 6000mm in white coil coated color, but if you go with some other color or wooden finish maximum length possibly is 1000mm.
Material Required:
- Baffle Panels
- Panel Jointer (not required in on alternate method)
- Threaded Wire
- Baffle Top (1) & Bottom (1) Bracket
- Edge Profile (not required in on alternate method)
- Threaded Wire Nut (2) + Washer (2)
- Baffle Bolt (1) +Nut (2) +Washer (2)
- Baffle End Cap (not required in wall-to-wall method)
- Baffle Carrier
- Carrier Jointer
Hardware Required:
1.Fastner
2.Screw/Nail
The typical baffle ceiling can be installed in one of two ways:
1. Wall to Wall: In this method, the baffle is started on one wall and ends on the other. If the baffle length becomes too short, a jointer is used to extend it.
2. On Alternative Length: In this case, we start the baffle at a particular distance from the wall, such as 50 or 100 mm, and after using the entire length of the baffle, we leave the same space as we did at the beginning before installing the second baffle. We continue with this method until we reach the opposite wall. Our solution makes use of an alternate length strategy, which makes the baffle feel completely airy and have a stunning appearance. Because there appears to be a haircap when we utilize jointers, that strategy also addresses the issue of baffle length.